Off the Rails December Colour & Sketch Challenge

Hi all. Here is my Off the Rails Design Team Contribution for the latest challenge over at Off the Rails Scrapbooking Challenge Blog. It's a sketch with a colour scheme. 


The colours are simply beautiful. This is my take on the sketch and colour palette.


This photo is the table setting at my daughters 18th this year (I can only just say this year! it's the 31st lol)

I'm not 100% happy on the colour that my camera decided to pick the 12x12 up as. It's not as orange as the photo looks. The close ups below actually show the true colours.


I made the banner by folding paper over a piece of twine and cutting a "V" in the bottom of it.


 This photo shows the shimmer on the 12x12 background paper I used.

If you were interested in entering a Sketch with colour challenge, then this would be a good one. The prizes this time come from Stick on Butterflies

You have until January 9th  at 9:00am est to upload your project. 
I can't wait to see your creations.

Cheers

Fiona


xx

Tutorial on making a Back Ground for your layout

You Tube Tutorial

 Best Friends Forever

I everyone. I've made a 15 minute tutorial to accompany my latest lay out.


Lots of techniques used to make up the back ground on this lay out.


I used stamps from Tim Holtz's Mini Muse collection.


And the Harlequin Stencil from Crafters Workshop.


I used Tim Holtz Distress Inks Wild Honey, Ripe Persimmon and Evergreen Bough along with Shimmer Mists- Mandarin and Dylusions Ink Vibrant Turquoise and Squeezed Orange.


I added some toilet roll marks with paint and some embellishments.


I had heaps of fun making this tutorial. I hope you enjoy it and it gives you some ideas on making a back ground your self.

Cheers

Fionaxx

OUAS December Challenge "My Favourite Month"

January

This challenge over at Once Upon a Sketch came together so effortlessly. Once I'd decided which month was my favourite, it all just fell into place.


Following the sketch, once again, worked really well. I love having a guide of where to place things. It makes scrapping that little bit easier and therefor even more enjoyable.

This is my take on the challenge.


January is my favourite month. It's in a period of rest from work for me as my day job shuts it's doors for a couple of weeks, the sun shines (mostly), we live only a few minutes from the beach so we go swimming often and best of all, we get to celebrate Australia Day on the 26th with a family get together and a B-B-Q.

I had been saving this paper 
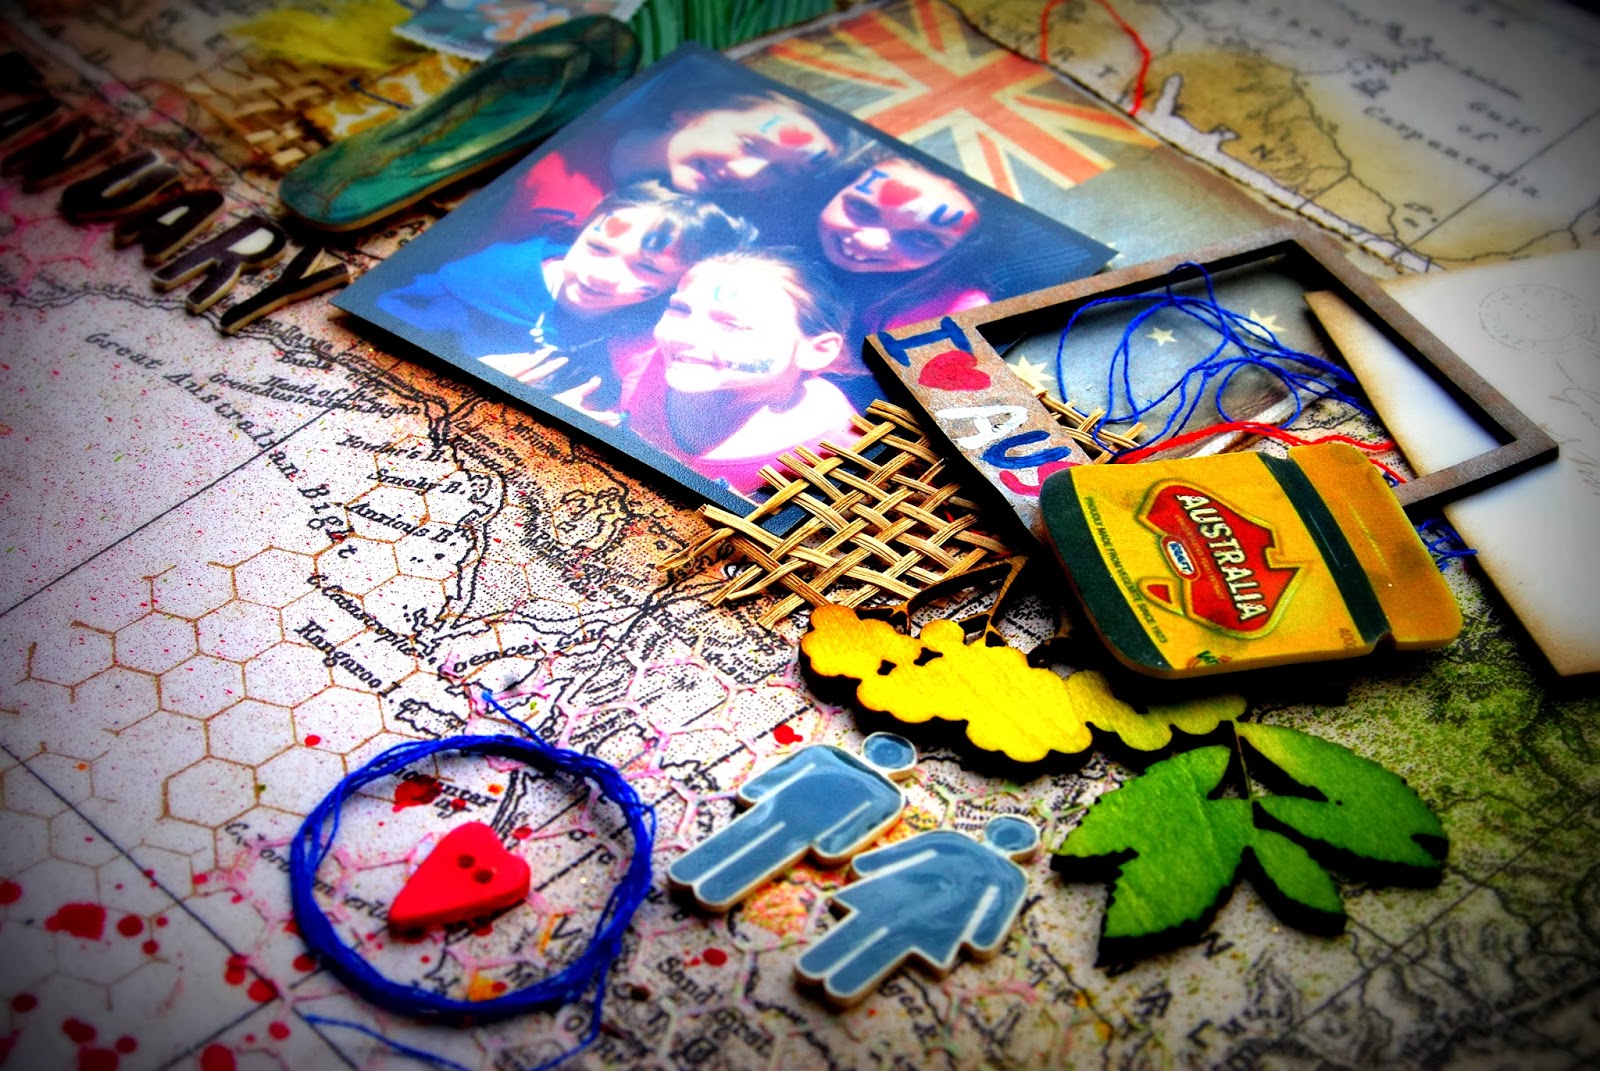
"Great Southern Land"  from Kaisercraft for a while now, waiting for just the right project to come along and here it is!


I made a few shrinky Dink embellishments that are specific to the theme. Like the vegemite jar, potty people and thong. The wooden flourish is Kaisercraft too. I sprayed it half with "Lemon Zest" and half  with "Cut Grass" Dylusions Ink Sprays. It's actually called "Twig and Berries",  but if you spray it yellow and green it looks like wattle, Australia's National Flora.


 I added journalling to a tag that slips into a little envelope I decorated with an Australian postage stamp. I also stamped it using a Kaszazz stamp called "Address Small". What I love about it, is it says NSW in the post mark so it makes it Australian. Kaszazz also have a beautiful range of Australian papers and stamps in their catalogue starting on page 108.


The Journalling says

" January is sun, beach, fun, family time, Australia Day, camping, swimming and sunburn!"


I've done a little bit of background work. A chicken wire stencil and stamp, a little bit of coordinating Dylusions Ink Sprayed randomly and some red paint splatters. The word January is hand written onto shrinky dink plastic with a permanent marker, cut out and shrunk. I wanted a bit of a rough, rustic look to it.


I've located our home town on the map with a little heart button. As you can see, we are right on the coast in lower South Australia.


This page was awesome to create. I'm so proud of my country and love to celebrate it in January. Making a scrapbook layout about it just seemed the natural thing to do.

Thanks for popping by and checking out my blog.

If you want to get up dates on my posts you can become a member and follow me on Blog lovin or like my page on Face book. The link to it is HERE.

Cheers

Fiona

Scrap Around the World December Mood Board Challenge

December SATW Challenge


The mood board for December from Scrap Around the World challenge blog is simply beautiful.


I took my inspiration from the antique frames, pastel colours and the mint gem in the ring. This is what I created.


The mint frame on the layout I made from Shrinky Dink Plastic. It was tedious cutting it out but worth it in the end. The beautiful big pink material flower I made one weekend while camping. I have a little
"Tool Box" I take with me so I can scrap or make bits such as flowers and other embellishments.


I coloured the roses with Dylusions Ink Spray to compliment the layout.


Most of the patterned paper comes from Graphic 45's "A lady's Diary". They are such pretty papers and match the mood board really well.


I layered the background with a Crafters workshop stencil and some texture paste then sprayed Shimmerz over it. It's hard to see in the photos, but it really glitters in the light.

Thank you for popping in and checking out my entry for the December Scrap Around the World Challenge. It was heaps of fun to do a really pretty layout.

Cheers

Fiona

123 Challenge Blog

Metalics with Joy and Bows


I love Christmas. I mean really which scrapper doesn't? But it's a busy and tiring time of the year and unfortunately the scrapbooking gets put aside for Christmas catch ups, extra shopping and for some unknown reason, manic house cleaning duties! So this challenge from 123 Challenge Blog came at just the right time for me. I've had to stop, sit down and create. Just what I needed, and look I made a card. I know! A card! I hardly ever make cards. But here it is.


 The colour, word and technique, I felt, lent itself perfectly to a Christmas card. I cut out two Reindeer from the Tim Holtz collection from chipboard. One is covered with up-cycled music paper which I glued on before I sent it through my "Vintaj" Big Kick. I used two cut outs so it would really pop out of the card.


I tied a little gold bell around his neck with a piece of red twine to incorporate both metallic and bow into the card.


I added the word "Joy" also with some little red twine bows to include the final requirement. 


The back ground consists of a Carved Ornament cut from another of Tim Holtz's dies. Then layers of patterned Christmas themed paper, some woven raffia a chipboard star a tiny felt snowflake and some Christmas Holly. Finally a little bit of stamping and it was done. Seriously, it took me almost as long to complete as a 12x12 page normally would. I really need to practice my card making!

I have given it to a dear friend (No pun intended!) who, every year makes me the most beautiful Christmas card with out fail. I hope this little gesture brings as much joy to her Christmas, as the pleasure of creating it has to mine xx

Cheers

Fiona


Scrap Friends December Sketch Challenge

My Boy & My Girl


Scrap Friends December Sketch Challenge was AMAZING! I mean have a look at it! It's got everything. Texture, shape, character and circles, lots of circles. I had an absolute ball playing with this one. I'm so excited to show you my take on it.


And here it is. My Boy and My Girl!


The colours came out really well. I love turquoise and it worked really well combined with a soft pink and orange. The stamp I used to emphasize the circles was Prima's "Stitch Stamp". I love this stamp. You can get it in circles, lines, squares, rectangles and ornate rectangles. I think I'm going to have to get them all!
Here are some close ups. The colour is a bit off, it looks more blue than turquoise, because of the way my camera seems to interpret blues and greens! The first whole page photo above is a pretty close colour match. I just wish you could all see it in real life. It's one of those pages that looks so much better in the flesh.
The patterned paper is an old piece from a Creative Memories freebie pack. It's perfect! It's not something I would normally look at purchasing when browsing for papers. I always wonder how different a page could have turned out when I find myself using a paper, colour or embelishment I wouldn't have normally bought. I need to learn to buy outside my comfort zone maybe.
The back ground layer is Reeves acrylic "Deep Turquoise" blended with white. The highlights and touches of colour are from Perfect Pearls Mists "Blue Raspberry", "Mandarin" and "Interference Red". I've also used some Dylusions Ink Spray in the "Calypso Teal" and Tim Holtz's "Peacock Feathers" Distress Stain to do some SPLATS!
I've added some Potty People from Um Wow Studio. I love their chipboard pieces.

And I made my own little signs for My Boy and My Girl.


The little girl and boy I made out of shrinky dink. I printed an image straight onto the paper from my computer, cut it out and shrank it in the oven. So cute.


Thanks for checking me out. If you want, you can follow my blog updates on my Facebook page. Follow the link HERE to pop on over.

Cheers

Fiona

Free for All - Off the Rails Challenge

Off the Rails Scrapbooking challenge blog has a new challenge up. The theme is FREE FOR ALL!

My contribution as a Design Team member is this pretty little printers tray.


I used Graphic 45 Once Upon A Spring Time papers to create this piece. Lots of fussy cutting involved but it was worth it.

Click HERE to pop on over to the blog and check out the other designers awesome free for all projects. I hope you join us.

Happy scrapping

Cheers

Fiona


WW1 December challenge - Banana

Go Banana's

So I've completed my first challenge for the month. I enjoyed the last White With One challenge so much that this was easily my first choice out of a possible five challenges for the month. I love the unusual colours they give us and this month is no exception. BANANA!


This is my take on the challenge.

I have to say it was definitely a challenge finding banana coloured bits for this layout. I ended up colouring my flowers and feathers with Dylusions Ink Spray.


My affection with feathers continues thanks to my new stamp (Still lovin' it)


I wanted a nice big flower on this layout so I made a cloth one in white cotton and sprayed it to match.


So much fun. Such a happy colour! makes me smile every time I look at this page.


Thanks for popping by.
Don't forget to like my Face Book page to get updates on my blog posts
:)

Cheers

Fiona


Scrap Friends November Sketch Challege

Peacock Green

I've had some Peacock feathers laying around for a while now and not really been sure what to use them for then this challenge came along.

The November Scrap Friends Sketch Challenge.


I especially went and bought a feather stamp from Kaszazz just to do this challenge but I'm pretty sure I'll use it in other projects.

This is my take on the sketch.


I used my love of mixed media at the moment to create the background.


 The feather stamp is just perfect. After I stamped them, I coloured them with water colours, cut them out and lightly edged them with black distress ink.


 The number four is from Tim Holtz's Bingo pieces. They are normally red so I used some black gesso to very carefully change it's appearance.

In order, for the background, I used, Water colour paint then Dylusion spray then dictionary pages I crumpled up and glued down with a two part glue one part water solution and then texture paste on a circle stencil. I've also applied some black Ink stamping and lastly I sprinkled some Perfect Pearls.


Green is my favourite colour, so even if this was a disaster I'd still love it! My fingers are all green and shimmery. So cool :)

Cheers

Fiona