Oh Deer! A Christmas Ornament for 7 Dots Studio

Well tomorrow we celebrate another Christmas day and a New Year is just around the corner. I would like to take this opportunity to say a HUGE thank you to each and everyone of you who have supported me through my journey this year. It has been a whirl wind!

I am very honoured to finish the year up with this little last minute Christmas decoration. I love finding plain little pieces in stores at Christmas time and jazzing them up. This time I found a little reindeer in K-Mart for about $4.00. 

I dressed him up with some gorgeous 7 Dots Studio papers and elements and now he looks a million dollars!


To begin the makeover I glued on some paper from the "Writers Block" collection and then trimmed as much off as I could before filing down the edges to make it look nice and smooth. Ssshhhhhh I forgot to do the inside of his antler ..... no one will notice .. right? 


As you can see with the original piece it is wooden, so the surface was nice and porous. I used gel medium all over to glue the paper on. it worked a treat.


I added some glitter and white gesso to his face and antlers before starting to decorate his bodice.


Using a crocheted doily for the base, I built up some leaves and then a couple of stickers from the "Yuletide" collection and then a little piece of wood and some tiny pine cones.


I also added some stars from the "Writers Block" die cut elements.


Along with a chipboard bracket also from the "Writers Block" collection. I made a little pearl necklace with some gold wire and added that onto the deer to finish it off.


Finally I added the title "Christmas Day" from the "Yuletide" collection and the last coating of gesso and gold glitter.

I am really happy with this little makeover. It is a perfect addition to my Christmas decorations this year.

How are your decorations coming along. All done now or do you have some last minute pieces to create like me?

7 Dots Products used Include:


A Journal Page for 13 Arts

Hello! Well this is my last post for 13arts for 2016. What an amazing year it has been on this team. So many amazing opportunities have come my way and I have had the chance to get to know so many wonderful people who I now am proud to call my friends.


I wanted to create a journal page to celebrate my journey so far. My title is Dream, Magic, Believe. I truly believe that if you work hard and dream big, your dreams can become a reality.


I had so much fun playing with Olga's "His and Her" collection. it is my first real play with it and boy am I in love with the vintage look you can achieve from it!

 My background is made up from layers of  Rainbow Colors in both the  Black Duo and Brown. both of which compliment this vintage style perfectly. I also couldn't wait to try out the new Acrylic SPALSH! Ink in the Glitter Black. the photo's really don't do it any justice. this stuff is AMAZING!


13@rts products used:


Thank you so much to each and everyone of you for your support throughout the year. It has been amazing. I will most certainly see you all again in 2017!

I hope you all have a very safe and festive Christmas and New year. x


Christmas Wreath for 13Arts

Hello my beautiful arty people. Well it's that time of year when we all start our Christmas craft. I am a HUGE lover of my Christmas craft. I make at least half a dozen new things every year.


I often make a new wreath for my front door and this year I decided to go with a traditional Pine cone option. If you didn't have one of these you could use a Rattan Wreath. I adorned it with some of the most glorious foliage from the Christmas section on the 13@rts website.


The little Red Jagoda Berries are so perfect for this holly leaf spray. The red colour is just perfect and the little Pinecones finish the centre piece off just beautifully.


I also gave the pine cone wreath a little touch of  White Gesso. It looks a little bit like snow and gives the whole piece a more rustic feel.


I found that the Maple Leaves with the slightest touch of gold glitter the perfect filler for my spray but the main greenery I focused on was the Large Green Brocade Leaves. I enhanced them with some Shiny Powder in the green.

I am really happy with how it came out and can't wait to hang it on my front door. What Christmas craft will you make this season?

13@rts products used:

Ink Acrylic SPLASH! Glitter - Scarlet


November challenge over at Scrapki-Wyzwaniowo

I forgot to blog my little light bulb dude :(. It was last month over at Scrapki-Wyzwaniowo. The theme was "Light Bulbs" so I made a little robot dude with a light bulb head!


I used an old rectangle tin I found in a junk shop as the body and some long screws for the legs.


The feet are the bowls from a pair of spoons and the arms are the handles from those same spoons.


I added some Um Wow Studio Chipbpoard gears, a little Heart from Finnabairs Mechanicals and some words from the new 7 Dots Studio "Writers Block" collection.

So sorry it's a bit late. I have been soooooo busy.


December Challenge at VLVS

Hello my lovelies! I am here with you today to share a little tag I have created for the December challenge or at Viva Las Vegastamps!


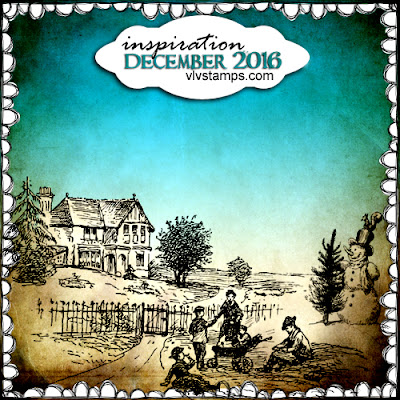
We'd like to inspire you with frames, scallops, doodles, vintage tones, tealgraytanwhiteblack,Christmastrees, WINTER, snowmensquirrels, snow angels, Victorian, house, scenery, road, snowbanks, family & more! Just be inspired ^_^

 Brown and teal together is one of my most favourite colour combinations! So I was very keen to create a background that would represent the mood.


Seeing that it's December I also wanted to give my tag a little Christmas theme so I popped the Santa and Reindeer stamp on it too.


Viva las Vegastamps! Used:


I hope you will join us. The link to take you to the monthly challenge is HERE

Don't forget the rules:
-Create a new project based on our inspiration board (it has to be posted this month, but you can certainly link up to other challenges as well!)
-Use at least one (but certainly more if you want) Viva Las VegaStamps! rubber stamps
(We are now allowing competitors stamps to be on your work, but please make VLVS! the focus of the project, thank you.)
-Post it to your blog with a link back to us
-Upload to our linky using your direct blog post link (You may also upload via facebook, flickr or other gallery)
You could win a Project Spotlight post on our blog + some new rubber of course.
And visit us back here for inspiration!

Good Luck!

Mail Art Monday for VLVS

 Welcome to Mail Art Monday!


I have decorated a little white envelope with some of my favourite stamps from Mary Vogal Lozinak.


 The feature stamp of the piece is the glorious "Whimsical Lettered Man" that I think is just way too beautiful to be a man. This would have to be one of my most favourite stamps EVER and seeing that VLVS has over 20,000 stamps to choose from, that's saying something!


I added interest to the stamp with Alcohol Ink Markers. I have a love hate relationship with mine .... I have ruined many a project using my AIM's .... if I'm not concentrating it can end up being a big brown messy mess!!


 I finished the bottom of the envelope off with the gorgeous little "Whimsical Background" stamp. I always want to call this one something more like flower garden or flowers in a row. Again it's one of my faves ..... it makes the best border stamp. Both of these stamps can be found on plate 1457.

Viva Las Vegastamps used:


A Layout for 13@rts

Hello I am here with you today to share a layout I have created using the gorgeous "Aria Story" collection from 13 Arts.
 I was so excited when my parcel turned up. I couldn't wait to pull out all the yummy new papers and make something!


 Using the Aria Story was like having sunshine on my table.


It is so bright and beautiful!


13@rts products used include:


Thank you for popping by. I'll see you all again soon xx


A little Chipboard Mini Book For 7 Dots Studio

Hello I'm here with you today to share a little mini album I have created for 7 Dots Studio  using some of the new yummy "Cotton Candy Dreams" collection.


I couldn't wait to unpack my parcel that arrived only the other day ... I got straight into creating with it!


This little mini album was such a great way for me to try out all the papers and read through all the little sticker words.


I used the 6x6 paper pad from the collection to cover most of my chipboard tags.


But I also added some of the chipboard from the collection and some of the die cuts and stickers.


I also added a little bit of my own flair to it with some drawings.


I hope you like my little chipboard book. It was the best way to see what the collection had to offer. I think this is definitely as new favorite collection of mine. I'll see you all again soon.

Products used included:


Um WOW Studio products used:


A Little Set of Drawers for VLVS

I have a confession to make ...... I am TOTALLY addicted to this style. Since doing my pencil case makeover ... I've gone mad with this!! Now I've made over a little set of drawers that I picked up in a craft store a while back.

The layers ..........


The doodling .........


The stamping ..........


The colors!!! ..........


I am so in love with it!!!


Viva Las Vegastamps used:
Plate 1480
Freud Writing Background

I can't seem to decide lately whether I like all the bright colours in my work or neutral earthy tones ..
I'll just keep creating and see what comes up next.

Thank you so much for popping by. I'll see you all again soon xx